Wear Patterns & Inspection Guide
Learn how to inspect your firearm for wear: barrel erosion, spring fatigue, extractor wear, feed ramp condition, rail wear, frame cracks, and magazine wear. Know what is normal and when to replace.
Every firearm wears over time. Understanding what normal wear looks like, recognizing the signs that indicate a part needs replacement, and knowing where to look are essential skills for any responsible firearm owner. Regular inspection prevents malfunctions, maintains accuracy, and ensures safety. This guide walks through every major wear point on common firearm platforms. Estimated reading time: 14 minutes.
Important Safety Warning
Always verify the firearm is completely unloaded before inspection. Remove the magazine, lock the action open, and visually and physically confirm the chamber is empty. Inspection requires handling the firearm in ways that could be dangerous if a round is present.
Inspection Fundamentals
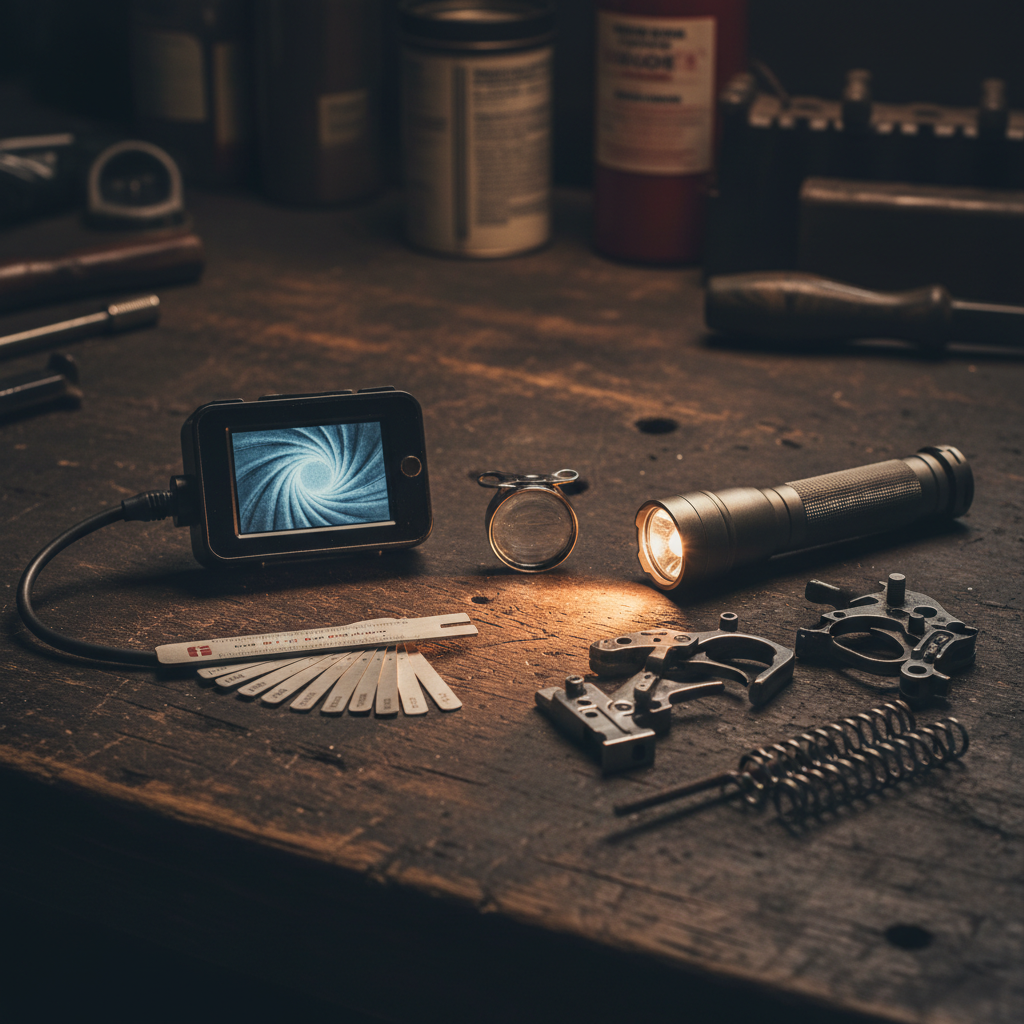
Effective inspection requires good lighting, a clean firearm, and a systematic approach. Before beginning any detailed inspection:
- Clean the firearm thoroughly. Carbon fouling, oil, and debris hide wear patterns. You cannot inspect what you cannot see.
- Use good lighting. A strong flashlight or bore light is essential for internal inspection. Natural daylight is best for exterior surfaces.
- Work on a stable surface. A gun vise holds the firearm securely and frees both hands for inspection. The Tipton Best Gun Vise is excellent for this.
- Document what you find. Take photos of areas of concern. This allows you to track progression over time and provides useful information if you consult a gunsmith.
Tools for Inspection
- Bore light or bore scope: Essential for examining bore and chamber condition
- Magnifying glass or loupe (10x): Reveals fine cracks, erosion, and wear marks invisible to the naked eye
- Flashlight: Illuminate dark interior areas
- Gun vise: Stable platform for hands-free inspection
- Feeler gauges: Useful for measuring headspace and other clearances
- Go/no-go gauges: Definitive headspace testing for bolt-action and semi-auto rifles
Barrel Wear
The barrel is a consumable component. Every round fired erodes material from the bore through heat, pressure, and friction. Understanding where and how barrels wear helps you assess remaining barrel life and maintain accuracy.
Throat Erosion
The throat (or leade) is the area of the bore immediately ahead of the chamber where the rifling begins. It experiences the most extreme conditions: peak pressure, peak temperature, and direct exposure to hot propellant gases.
- What happens: The rifling lands erode and become rounded, the throat diameter increases, and the leade lengthens
- Effect on accuracy: As the throat erodes, bullet engagement with the rifling decreases, reducing the barrel's ability to stabilize the bullet consistently
- What to look for: Using a bore scope, compare the sharpness of rifling at the throat versus the mid-bore. Significant rounding or washout at the throat indicates substantial wear
- Caliber dependence: Hot, overbore cartridges like .264 Winchester Magnum may show throat erosion in 1,000-1,500 rounds. Moderate calibers like .308 Winchester may last 5,000-8,000 rounds. Low-pressure cartridges like .22 LR can last 50,000+ rounds
Muzzle Crown
The muzzle crown is the last thing the bullet touches before leaving the barrel. Its condition directly affects accuracy because any asymmetry in gas release around the bullet as it exits will deflect the bullet unpredictably.
- What to look for: Nicks, dings, uneven wear, or damage to the crown edge
- Causes of damage: Dropping the firearm muzzle-first, improper cleaning rod use (especially from the muzzle end), contact with hard surfaces
- Effect: Even minor crown damage can open groups by 1-2 MOA or more
- Remedy: A gunsmith can re-crown a barrel relatively inexpensively, restoring accuracy without replacing the barrel
Protect Your Crown
Always clean from the breech end when possible. If you must clean from the muzzle, use a bore guide to center the cleaning rod and prevent contact with the crown. This simple habit protects one of the most accuracy-critical surfaces on your firearm.
Mid-Bore and Rifling Wear
The bore between the throat and muzzle wears more slowly than the throat but still degrades over time:
- Copper fouling patterns: Excessive or uneven copper deposits can indicate rough spots or micro-cracking in the bore surface
- Rifling sharpness: Use a bore scope to assess rifling condition throughout the barrel length
- Fire cracking: In high round-count barrels, fine cracks can form in the bore surface from repeated thermal cycling. This is a sign the barrel is approaching end of life
Barrel Wear Indicators by Caliber
| Caliber Category | Examples | Typical Barrel Life | First Accuracy Check |
|---|---|---|---|
| Rimfire | .22 LR, .22 WMR | 30,000-50,000+ rounds | 15,000 rounds |
| Pistol | 9mm, .45 ACP, .40 S&W | 20,000-50,000 rounds | 10,000 rounds |
| Moderate rifle | .223/5.56, .308/7.62 | 5,000-20,000 rounds | 3,000 rounds |
| Magnum rifle | .300 WM, 7mm RM | 2,000-5,000 rounds | 1,000 rounds |
| Overbore magnum | .264 WM, .26 Nosler | 800-2,000 rounds | 500 rounds |
These are approximate figures. Barrel life depends heavily on shooting cadence (sustained fire wears faster), ammunition quality, and barrel material and treatment.
Spring Fatigue
Springs are the most commonly replaced components in firearms. They are under constant stress whether the firearm is being fired or simply stored with a loaded magazine. Over time, springs lose tension and can cause malfunctions.
Recoil Springs
The recoil spring (or action spring) returns the slide or bolt to battery after firing. It is under enormous stress during each firing cycle.
- Signs of wear: Sluggish slide return, failure to fully go into battery, increased felt recoil, ejection pattern changes
- Replacement interval: Most manufacturers recommend replacement every 3,000-5,000 rounds for semi-auto pistols. High-volume competition shooters may replace more frequently.
- Testing: Compare spring free-length to a new spring. A reduction of more than 10% indicates replacement is needed.
Magazine Springs
Magazine springs are under constant compression when magazines are loaded. There is ongoing debate about whether keeping magazines loaded weakens springs. The current engineering consensus:
- Static compression: Quality springs loaded to less than full capacity can maintain tension for years. The concern is overstated for modern magazine springs.
- Cycling fatigue: Repeatedly loading and unloading causes more spring degradation than static compression. Frequent cycling is the real wear driver.
- Signs of wear: Failure to feed, sluggish feeding, follower not pushing rounds up consistently
- Replacement: Replace when feeding becomes unreliable. For duty or defensive magazines, consider replacing springs every 3-5 years regardless of apparent condition.
Firing Pin / Striker Springs
- Signs of wear: Light primer strikes, misfires, inconsistent ignition
- Critical for reliability: A weak firing pin spring can cause misfires in cold weather or with hard-primered ammunition
- Replacement interval: Follow manufacturer guidance; typically every 5,000-10,000 rounds or at any sign of light strikes
Safety Notice
Spring replacement is not optional maintenance. A failed recoil spring can cause out-of-battery firing. A failed firing pin spring can cause light primer strikes with hangfire risk. Replace springs at recommended intervals, and immediately if you notice any symptoms of spring fatigue.
Extractor Wear
The extractor is a small but critical component that grips the cartridge rim and pulls the spent case from the chamber during cycling. Extractors are subject to significant mechanical stress.
- Claw wear: The extractor hook wears from repeated engagement with the cartridge rim. Inspect the hook for rounding, chipping, or reduction in depth. A worn hook cannot maintain a secure grip.
- Tension loss: Extractors rely on spring tension to grip the cartridge. Over time, the extractor or its spring loses tension. Reduced tension leads to extraction failures.
- Signs of extractor problems: Failures to extract, erratic ejection patterns, stovepipes, double feeds (caused by a spent case remaining in the chamber)
- Replacement interval: Varies widely by platform. AR-15 extractors are commonly replaced every 5,000-10,000 rounds. 1911 extractors may last longer with proper tuning. Replace at any sign of extraction issues.
Extractor Inspection Procedure
- Remove the bolt or slide and locate the extractor
- Examine the hook edge under magnification for rounding, chips, or cracks
- Check tension by pressing on the extractor; it should resist firmly and snap back
- For AR-pattern rifles, check the extractor spring and rubber insert (O-ring) for degradation
- Compare to a known-good replacement extractor if available
Feed Ramp Inspection
The feed ramp guides cartridges from the magazine into the chamber. Its surface condition directly affects feeding reliability.
- Normal appearance: Smooth, polished surface with minor contact marks from cartridge noses
- Concerning wear: Deep gouges, burrs, rough spots, or buildup of material
- Carbon buildup: Heavy carbon deposits on the feed ramp can cause feeding failures. Regular cleaning prevents this.
- Material buildup: Some hollow-point ammunition can deposit jacket material on the ramp. This creates a rough surface that impedes feeding.
Feed Ramp Maintenance
Light polishing of the feed ramp with a felt bob and metal polish can restore smooth feeding. Never remove material aggressively. The goal is a smooth, mirror-like surface. If the ramp has structural damage (deep gouges or deformation), consult a gunsmith rather than attempting to fix it yourself.
Rail and Slide Wear
The rails on which a slide or bolt carrier travels are bearing surfaces subject to friction and wear over the life of the firearm.
Pistol Slide Rails
- Normal wear: Bright, polished contact marks on the rail surfaces where the slide and frame meet. This is expected and indicates proper fitting.
- Excessive wear: Visible looseness in the slide-to-frame fit, perceptible rattle, or impact on accuracy. Some looseness is acceptable in duty/combat pistols; target pistols require tighter fit.
- Peening: Metal deformation from repeated impact at the slide stop or locking surfaces. Common in high-round-count 1911s and other locked-breech designs.
AR-Pattern Bolt Carrier / Upper Receiver
- Carrier key: Check staking and tightness. Loose carrier keys are a common failure point. The screws should show no movement.
- Bolt lugs: Inspect all locking lugs for cracks, chips, or uneven wear. Cracked lugs are a serious safety concern.
- Cam pin hole: Check for elongation or cracking around the cam pin hole in the bolt
- Gas rings: Three gas rings on the bolt should maintain sufficient seal. Test by extending the bolt and standing the carrier upright on the bolt face; it should not collapse under its own weight.
Important Safety Warning
Cracked bolt lugs are a safety emergency. If you discover a crack on any locking lug of a bolt, immediately cease firing and replace the bolt. Lug failure under pressure can cause a catastrophic event. Inspect bolt lugs under magnification every 5,000 rounds.
Stock and Frame Inspection
Wood Stocks
- Cracks: Check the wrist (grip area) and around the tang for hairline cracks. These areas concentrate stress from recoil.
- Loose fit: Check bedding. A stock that has shifted or come loose affects accuracy and can allow water ingress.
- Finish degradation: Worn finish allows moisture penetration that leads to swelling, warping, and eventual cracking.
- Recoil pad: Check for deterioration of rubber or gel pads. Degraded pads become hard and lose their recoil-absorbing properties.
Polymer Frames and Stocks
- Stress cracks: Inspect around pin holes, magazine wells, and other high-stress areas. Hairline cracks can develop after very high round counts.
- Rail integrity: Check embedded metal rail inserts for looseness or deformation
- Magazine well wear: The magazine well opening can wear over time from repeated insertions, leading to magazine wobble
Metal Frames
- Cracking: Inspect frame rails, locking recesses, and pin holes for cracks. Less common than with polymer but more serious when it occurs.
- Peening: Check slide stop notch and other impact areas for deformation
- Finish wear: Note areas where finish has worn through, as these are vulnerable to corrosion
Magazine Wear
Magazines are the most common source of malfunctions in semi-automatic firearms. They are also among the easiest and least expensive components to replace.
Feed Lips
The feed lips control how cartridges are presented to the action. They are the single most critical part of a magazine.
- Spread or deformation: Feed lips that have spread wider than spec allow cartridges to pop out prematurely, causing double feeds or nose-dive failures
- Cracks: Metal fatigue can cause hairline cracks at the bend points. Cracked feed lips will fail.
- Measurement: Some manufacturers publish feed lip gap specifications. A small caliper allows you to check this dimension.
Magazine Body
- Dents and deformation: Metal magazines can dent from drops, affecting the follower's travel
- Polymer cracking: Polymer magazines can crack from impacts, especially in cold weather
- Witness holes: Check that round count witness holes align correctly with actual count; misalignment indicates internal issues
Follower
- Tilt: A worn or poorly designed follower can tilt under spring pressure, causing the last few rounds to misfeed
- Material wear: Polymer followers can wear at contact points with the magazine body, increasing friction
- Anti-tilt designs: Modern anti-tilt followers are a worthwhile upgrade for older magazines
Magazine Maintenance Rule
For any firearm you depend on for personal defense or duty use, maintain a rotation of magazines and mark them. If a magazine causes a malfunction, mark it, clean it, and test it. If it causes a second malfunction, discard it. Do not try to repair unreliable magazines for critical-use firearms. Magazines are consumable items.
Normal Wear vs Concerning Wear
Not all wear is a problem. Firearms are mechanical devices and wear is expected. Here is how to distinguish routine from worrisome:
| Area | Normal | Concerning |
|---|---|---|
| Slide rails | Bright polished contact marks | Excessive play, visible galling, metal flaking |
| Barrel throat | Slight rounding of initial rifling | Significant erosion, fire cracking, accuracy loss |
| Muzzle crown | Minor carbon buildup | Nicks, chips, uneven edge, asymmetric wear |
| Bolt lugs | Even contact marks on all lugs | Cracks, chips, uneven lug engagement |
| Extractor | Smooth hook with minor polish marks | Rounded or chipped hook, loss of tension |
| Feed ramp | Light contact marks, polished surface | Deep gouges, burrs, rough patches |
| Recoil spring | Minor length reduction (<5%) | >10% length reduction, kinks, corrosion, deformation |
| Frame/receiver | Finish wear at holster and handling points | Cracks at pin holes, rail deformation, peening |
Recommended Inspection Schedule
| Interval | Inspection Tasks |
|---|---|
| Every cleaning (after use) | Visual check of bore, chamber, and exterior during cleaning; note anything unusual |
| Every 500 rounds | Check extractor hook condition, recoil spring length, feed ramp cleanliness, magazine feed lips |
| Every 2,000 rounds | Detailed bore inspection with bore light, bolt lug examination, firing pin protrusion check, frame/receiver stress point inspection |
| Every 5,000 rounds | Replace recoil spring (or per manufacturer spec), check headspace (bolt guns and semi-auto rifles), thorough extractor assessment, stock/frame crack check |
| Every 10,000 rounds | Consider professional armorer inspection; evaluate barrel accuracy (bench rest test vs new); check all springs for fatigue; inspect for frame and rail wear |
| Annually (regardless of round count) | Full visual inspection of all firearms, even those not fired. Check stored firearms for corrosion, verify action function, test all magazines |
Automate Your Schedule
Use our Maintenance Schedule Generator to create a personalized inspection calendar based on your specific firearms, round counts, and usage patterns. Build your schedule →
When to Replace Components
Some components are clearly "replace when failed." Others should be replaced proactively. For any firearm used for personal defense or duty, err on the side of proactive replacement.
Replace Proactively (Before Failure)
- Recoil springs: Every 3,000-5,000 rounds (pistols) or per manufacturer recommendation
- Firing pin springs: Every 5,000-10,000 rounds
- Magazine springs: Every 3-5 years for duty/carry magazines regardless of round count
- Extractor and extractor springs: Every 5,000-10,000 rounds for AR-pattern rifles
- Gas rings (AR platform): When they fail the stand-up test; keep spares on hand
Replace When Worn or Damaged
- Barrels: When accuracy degrades below acceptable standards for the firearm's purpose
- Magazines: When they cause repeated malfunctions after cleaning and spring replacement
- Stocks/grips: When cracked, especially at the wrist or grip areas
- Sights: When damaged, loose, or the tritium has dimmed (replace tritium vials every 10-12 years)
Replace Immediately (Safety Critical)
- Cracked bolt lugs: Do not fire until replaced
- Cracked frame or receiver: Do not fire until assessed by a gunsmith
- Failed headspace (no-go gauge): Do not fire; requires professional diagnosis
- Bulged or cracked barrel: Do not fire; barrel replacement required
Important Safety Warning
If you are unsure whether a component is safe, stop shooting and consult a gunsmith. The cost of a professional inspection is trivial compared to the potential consequences of a mechanical failure. Never rationalize continuing to shoot a firearm you have doubts about.
Related Resources
Affiliate Disclosure: FirearmCharm.com is a participant in the Amazon Services LLC Associates Program. We may earn a commission from qualifying purchases at no additional cost to you. Our recommendations are based on thorough research and are not influenced by commission rates.